Moving from Synology to Unraid - data migration
Introduction
My old Synology NAS (model DS212j) which I use for data backup was working slower and slower, and with Synology changing their supported hard drive compatibility policy recently, I made the decision to look into building my own NAS. I could just buy something pre-made but that would be no fun so a nice little learning project started.
This blog also shows you how to mount a Synology NAS disk on Unraid so you can access its data.
Hardware
I looked into different hardware and decided that my needs were fully met with an old Dell OptiPlex 9020 MT I had somewhere in the basement. It contained an Intel i7 and I upgraded it from 8GB to 32GB of RAM. It also contained a 250GB SSD. My plan was to re-use the 2 Synology 4TB drives as data drives in my new NAS. So in the end the hardware specs of my (old) new NAS are:
- Intel® Core™ i7-4790 CPU @ 3.60GHz
- 32GB DDR3 1600 MHz CL11 (4x 8GB)
- 250GB SSD
- 2x 4TB SATA HGST HDN726040ALE614 (Hitachi/Western Digital now HGST)
- 1 Gigabit ethernet port (as my network is still Gb this would be the speed bottleneck anyway!)
I figured out I needed some extra SATA cables and cradles for the hard drives.
Software
I wanted my NAS to be somewhat DIY but not too much so I opted NOT to go for a plain FreeBSD with ZFS. I wanted some kind of web frontend for easy configuration. Options I found interesting and mature were TrueNAS and Unraid.
TrueNAS
TrueNAS is a mature and stable NAS offering which offers solid ZFS support should I want that. Looking into TrueNAS I saw that the flexibility to mix and extend the storage array with different kinds and sizes of disks was limited which would impact me in the future if I wanted to easily extend my storage.
Unraid
Unraid offers a solution as mature as TrueNAS with some extra options outside of the NAS space. The possibility to easily extend my storage in the future was a selling point for me. Although not free the license fee is $49 for a year of updates, which sounded reasonable for me. It has a trial license of 30 days.
I decided to go with Unraid and see if it suits me.
Unraid installation
Unraid is installed on and booted from a USB drive and is super easy to install. It took me 15 minutes to create the USB drive and change the BIOS settings to boot from USB. I was greeted with a pleasant web interface to set up my storage array (2x 4TB) and my cache drive (1x 250GB SSD).
So how do I get my 3TB of data from my Synology disks into my Unraid NAS using the same disks?
Data migration
Analysis
I had to figure out how to move 3TB of data from my RAID1 SHR Synology setup to my Unraid NAS, preferably using the same disks without having to copy my data to an >=3TB external USB drive (which I did not have).
Synology SHR is explained here but it is in essence a hybrid RAID setup with a spare disk.
So in theory both disks contain the same data and I should be able to just unplug one disk and have the data available on the other disk. I unplugged one disk from my Synology and indeed all my data was still available, albeit there is no more redundancy anymore.
I hooked up the disk to a SATA port in my new Unraid NAS and had a look at how to disk is partitioned. It looks like the Synology SHR setup is a Linux Software RAID configuration with LVM volumes. I was able to get access to the data using mdadm and the LVM tools.
So I took one 4TB disk out of my Synology NAS, wiped it and created an empty Unraid Storage Array with only that disk. I took the other 4TB Synology drive and connected that as well to my Unraid machine.
Migration
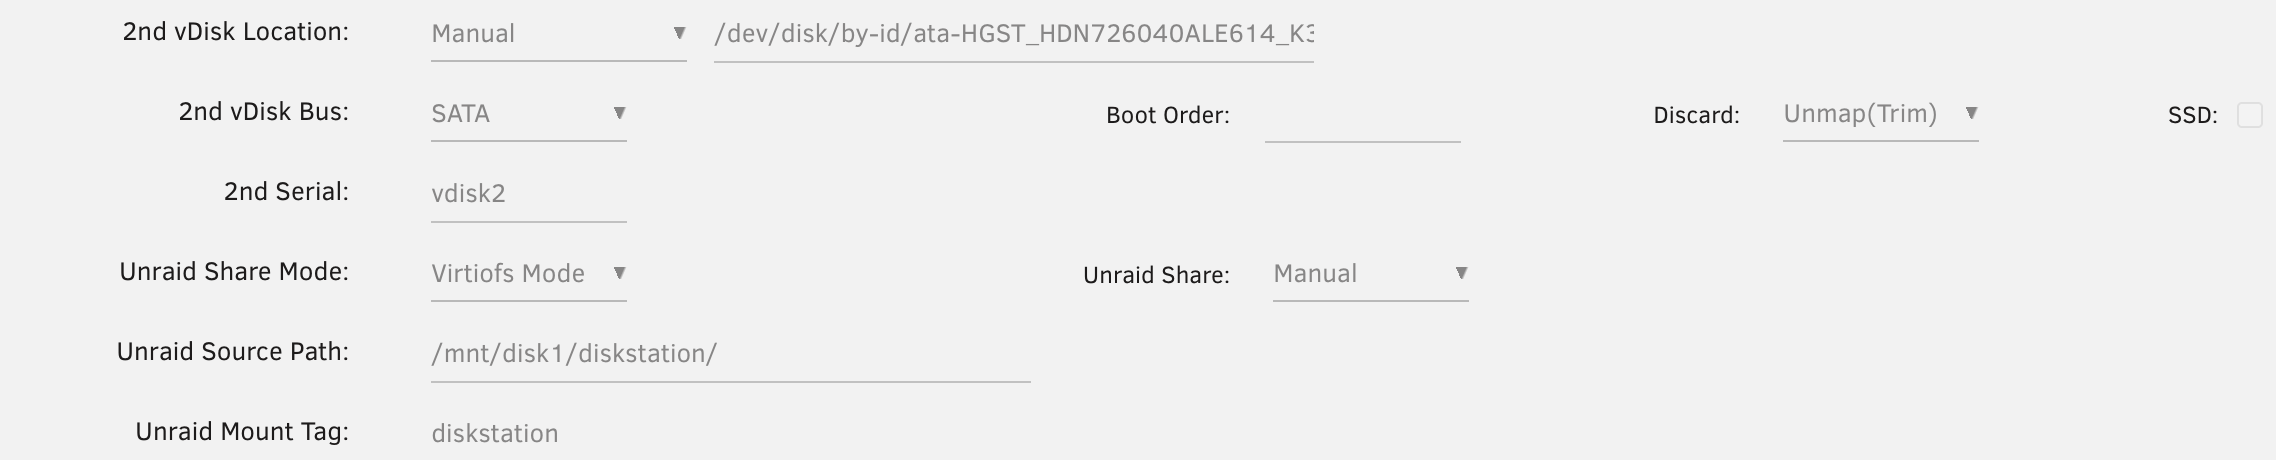
I used Unraid to create an Ubuntu 24.04 VM and hooked up the Synology 4TB disk with my data as a 2nd vDisk and shared my new Unraid Share to the Ubuntu VM as a VirtioFs share. This way I could copy all the data from the Synology disk to my new Unraid share.
I started my Ubuntu VM and entered the VNC terminal (Unraid has pretty nice VM and docker container support!)
Let’s reconstruct the Synology data disk.
# lsblk
...
sda
|-sda1
|-sda2
|-sda5
| -md126
|-sda6
| -md127
...
Let’s stop the array first as they are marked as started.
# mdadm --stop /dev/md126
mdadm: stopped /dev/md126
# mdadm --stop /dev/md127
mdadm: stopped /dev/md127
Now let’s ask mdadm to scan for arrays and reconstruct them into an md device
# mdadm -AsfR
mdadm: /dev/md/DiskStation:3 has been started with 1 drive (out of 2)
mdadm: /dev/md/DiskStation:2 has been started with 1 drive (out of 2)
Now let’s reconstruct the logical volume(s).
# vgchange -ay --activationmode partial
PARTIAL MODE. Incomplete logical volumes will be processed.
1 logical volume(s) in volume group "vg1000" now active
And indeed, the volume group is available!
# vgs
VG      #PV #LV #SN Attr    VSize   VFree
vg1000    2   1   0 wz-pn-  3.63t   0
# mkdir synology
# mount -o ro /dev/mapper/vg1000-lv ./synology
Your Synology data is now available. Let’s mount the Unraid NAS share which I gave the tag diskstation.
# mkdir diskstation
# mount -t virtiofs diskstation ./diskstation
That’s it, you are now ready to copy all the data from the Synology NAS drive to the new Unraid storage array. I used rsync for that.
# rsync -a --info=progress2 ./synology/ ./diskstation/
My throughput was on average 140MB/sec which is not too bad for all the virtual driver stacks it needs to traverse on 12 year old hardware.
Adding the second Synology data disk as Parity.
When the data was copied I added the second Synology disk as Parity. So now I have a new 4TB Unraid NAS with Parity and a 250GB SSD cache disk with all my data preserved.
Conclusion
This was interesting to do, it took me a while to figure out how to get my data from the Synology disk. In the end it might be easier for people to just copy the data to a large external USB drive if you don’t want to do the data migration dance I did.
My Unraid NAS has been running smoothly for a couple of weeks now and I am very happy with some of the extra functionality it offers. As my machine has 32GB of RAM and an i7 processor it is very suitable to run some containers and VMs if I want that, although Unraid also works wonderfully as a dedicated NAS with storage expansion options in the future.